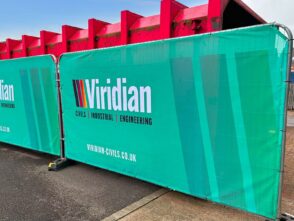
Heras fence covers serve an important purpose on construction sites, events, and business premises. They provide privacy, security, and a professional appearance whilst blocking unwanted views and reducing wind impact. Installing Heras fence covers correctly ensures they remain secure, look professional, and withstand harsh weather conditions.
Many people struggle with loose or damaged fence covers because they skip key installation steps. When covers aren’t fitted properly, they can tear, sag, or blow away in strong winds. This wastes money and creates on-site safety hazards.
We’ll explain to you exactly how to install Heras fence covers securely using the right techniques and equipment. You’ll learn the proper installation process, including how to attach covers safely and maintain them for long-term use. We’ll also cover best practices to help your fence covers meet safety standards and withstand daily wear.
Installation of Heras Fence Covers
Installing Heras fence covers requires the right materials, properly prepared temporary fencing, secure fixing methods, and correct tensioning to achieve a professional finish. We’ll walk through each stage to ensure your covers stay firmly in place.
Choosing the Right Heras Fence Covers and Materials
We need to select covers that match our specific requirements before starting installation. Heras fence covers come in different materials, with mesh banners being the most common choice for temporary fencing applications.
Mesh banners offer several advantages over solid vinyl options. They allow wind to pass through, which reduces pressure on the fence panels. This makes them more secure in outdoor conditions.
Key materials we’ll need:
- Heras fence covers (sized to our panels)
- Cable ties
- Scissors or wire cutters
The quality of fixing materials matters as much as the covers themselves. We recommend using UV-resistant cable ties rated for outdoor use. Cheap fixings can break within weeks, causing covers to sag or fall.

Preparing Temporary Fencing for Secure Cover Installation
We must ensure our temporary fencing is stable and properly assembled before attaching any covers. Unstable panels create safety hazards and won’t hold covers securely.
Check that each panel sits fully inserted into its base foot. The feet must be stable and undamaged. Use all required clips and couplers to join panels together securely.
Inspect the fence for damage before installation. Bent or broken mesh can create uneven surfaces that prevent covers from fitting properly. Replace any damaged panels.
We should clean the panels if they’re dusty or muddy. This helps us spot potential issues and ensures covers sit flush against the mesh. A quick brush down takes only minutes but makes installation easier.
Attaching the Covers: Secure Fixing Methods
We start by positioning the cover against the top of the panel. The cover should overlap the fence slightly on all sides if possible.
Secure the top edge first using cable ties through each eyelet. Thread each cable tie through the cover’s eyelets and around the fence mesh. Pull tight and trim excess length.
Work down both sides next, maintaining even spacing between fixings. Ensure you attach using all eyelet holes.
The bottom edge requires special attention. We secure it last, after checking the banners arepulled taught, ensuring the cover is fitted tight like a drum skin.
Ensuring the Correct Fit and Tension
Proper tension prevents covers from flapping, tearing, or looking unprofessional. We aim for a firm but not overly tight fit.
Pull the cover taut as we work down the panel, but don’t stretch it excessively. Mesh banners need some give to accommodate wind movement. Too much tension can tear the material at the fixing points. The banners should be taught and made sure they are not allowed to flap or billow.
Check for wrinkles or sagging areas after securing all edges. We can add extra fixings in problem spots if needed. The cover should sit flat against the fence without billowing out.
Walk back and view the installation from a distance. This helps us spot any uneven areas we might have missed up close. Make adjustments before moving to the next panel.
Test the security by gently pulling on different areas of the cover. All fixings should hold firm without slipping or breaking.
Weatherproofing and Maintenance Tips
We should inspect heras fence covers weekly for tears, loose fixings, or wind damage. Strong winds are the main threat to mesh banners, so we need to ensure all cable ties remain tight and haven’t become brittle from UV exposure.
We recommend replacing cable ties every 3 months as they weaken faster than the banner material itself.
During heavy rain, water can pool on loose sections of heras fence covers. We should tension the material properly during installation to prevent sagging. If water does collect, we need to drain it immediately to avoid excess weight pulling on fixings.
Remove debris, leaves, and dirt monthly using a soft brush and mild detergent. Avoid pressure washers as they can damage the mesh and graphics.
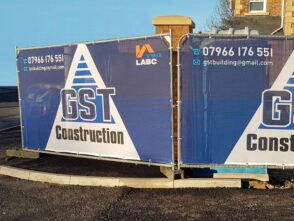
Safety, Branding, and Legal Requirements
Temporary fencing must meet health and safety regulations on construction sites. We need to secure heras fence covers so they don’t obstruct warning signs or reduce fence stability. Never cover safety notices, site entrance information, or emergency contact details.
Wind loading is a critical safety factor. Mesh banners create additional wind resistance on temporary fencing panels. All our Heras banners use wind-rated mesh that allows 30-40% air permeability to reduce wind pressure.
Ensure heras fence covers don’t create trip hazards at ground level. The bottom edge should sit at least 50mm above ground or be properly secured. On public footpaths, covers must not reduce visibility for pedestrians or vehicles at junctions.
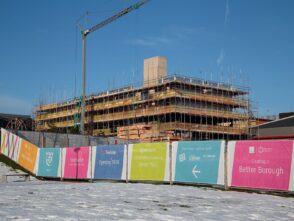
Enhancing Privacy and Site Appearance
We can choose different mesh densities based on privacy needs. Standard mesh provides 70-80% opacity. Consider your site’s purpose when selecting materials.
Darker colours provide better privacy than light ones. Black, navy, or dark green mesh banners obscure views more effectively than white or yellow. Graphics and branding should complement the privacy level required.
Consistent installation height creates a professional look. We should align all Heras fence covers at the same level across the site perimeter. Remove old or faded sections promptly as they damage the site’s appearance and your company’s reputation.
For long-term projects, rotate panels periodically to ensure even wear. Areas with direct sun exposure will fade faster than shaded sections. Planning this rotation maintains a uniform appearance throughout the project duration.


Leave a Reply
You must be logged in to post a comment.